
Neurographic art is a way to settle your mind into a meditative state through repetition. It’s easy, takes no practice or skill, and no matter what you do it looks pretty cool. It was developed by Pavel Piskarev, a Russian psychologist, in 2014.
As with all our Drawing Meditations, the purpose of making art is to let your mind relax and your subconscious thoughts to have space to bubble to the surface. While you are drawing, try not to think about things too specifically, but be aware of what thoughts come to the surface. If you want to direct your subconscious, start with a deep breath and as you exhale, state your problem, question, mantra, or a desired emotional state.
Give yourself at least 30 minutes to do this meditation. Create a space where you can work without distraction or interruption.
You will need: paper, a pen, something round to trace, and optionally color (pencils, pens, paint, etc)
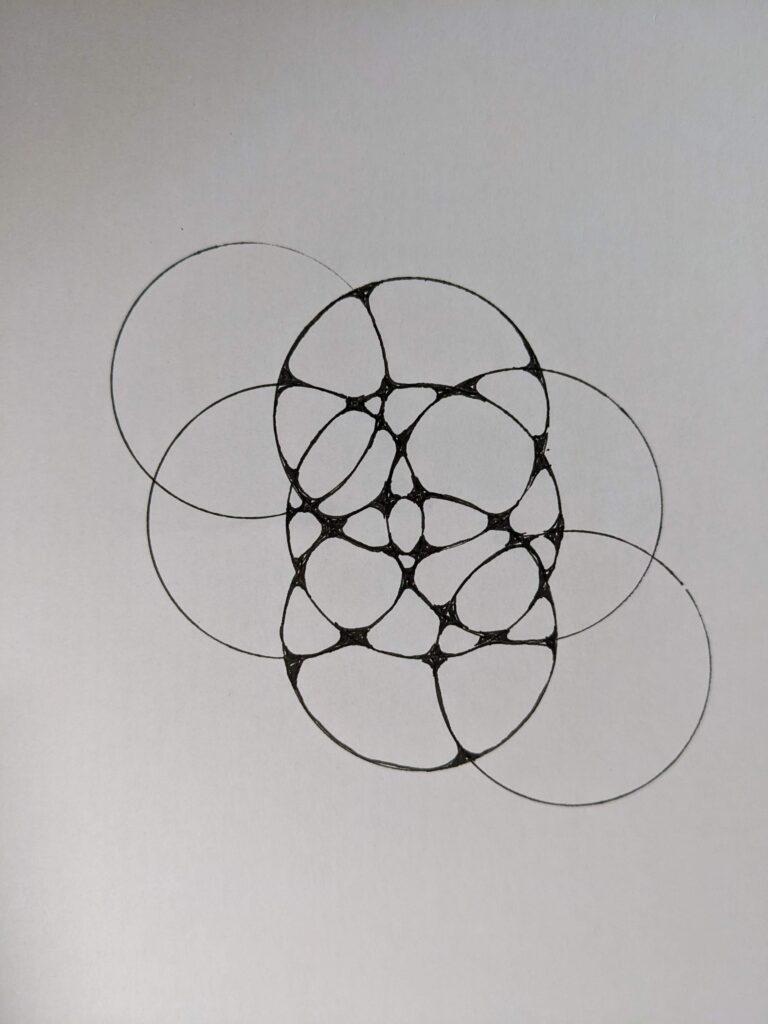
- First, trace overlapping circles onto a blank page. Use whatever circular object you have nearby – in my examples, I used a coffee cup, a spool of thread, and a mirror. The more circles you make, the longer your drawing meditation will take.
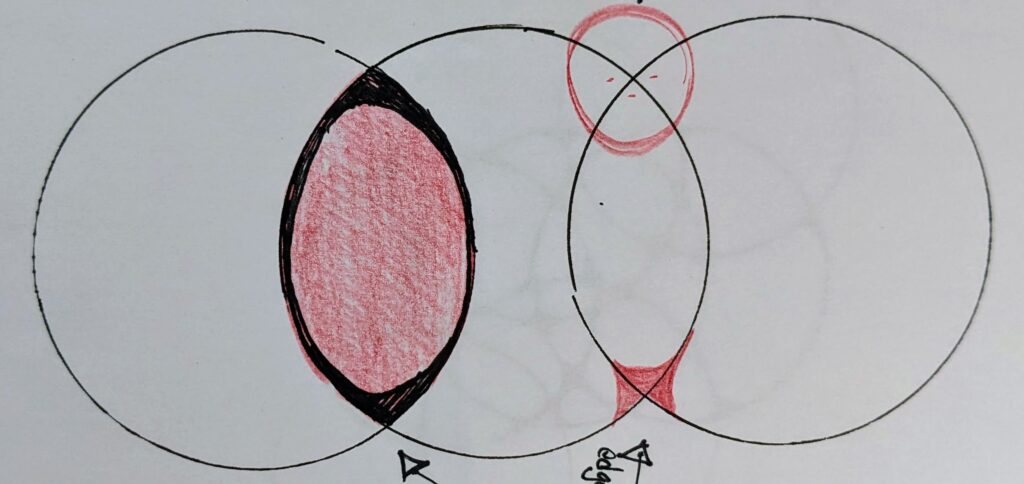
- Look for intersections where the circles overlap. See the example in the image above – an intersection is circled in the top right.
- Round off those intersections. And there are two ways to do this. You can choose one, or use both in the same drawing. It’s up to you.
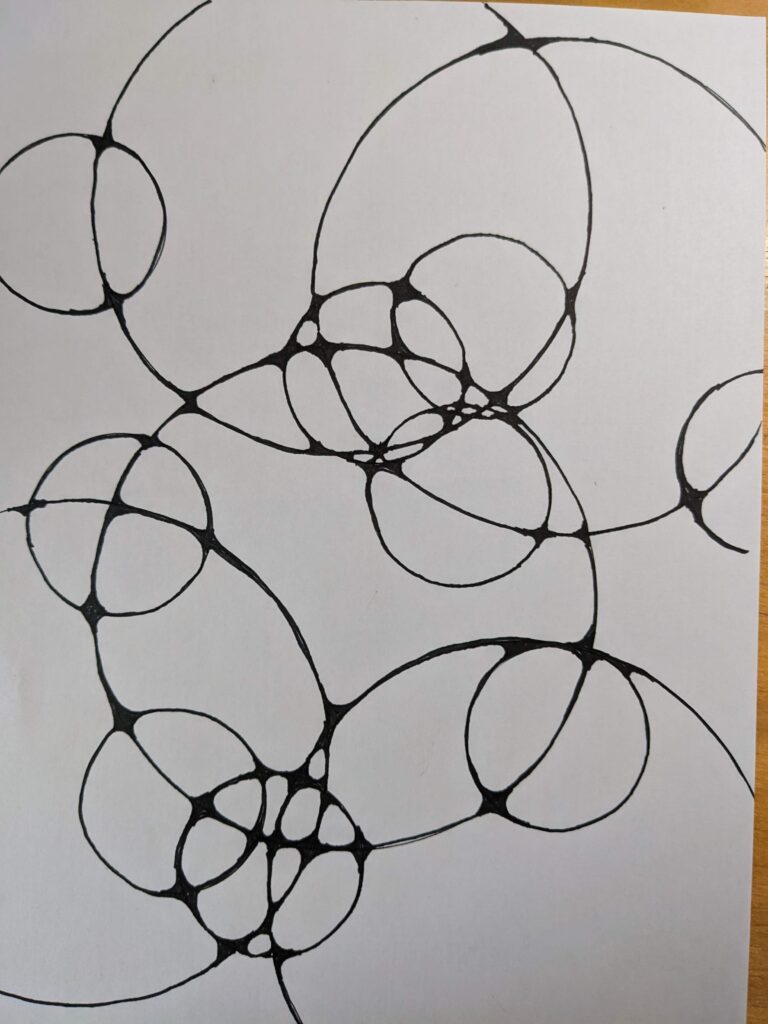
- Spiderweb the intersections. Make a curve from one side to the other and fill it in. When you do this on all sides of the intersection it looks a bit like a spiderweb. You are focussing on the edges, as in the example, bottom right.
- Bean the insides. At each intersection, look at the space that intersection creates. Round it off like a bean. Here you are focussing on the shape of the inside by framing the outside as in the left side of the example above.
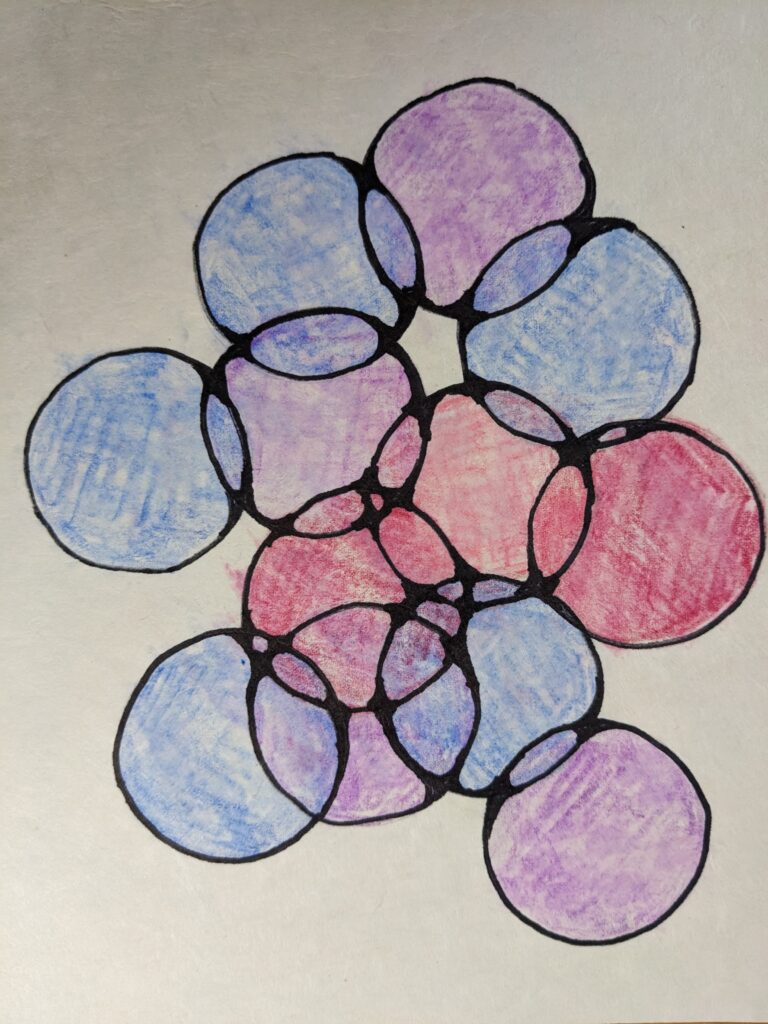
- After you have rounded all the intersections, you can continue the meditation by adding more details and color if you wish. For example:
- Thicken some of the lines
- Outline or inline the shapes
- Accent areas with details like dots or hatching
- Fill shapes with repeating patterns
- Color each circle and let the colors blend in the overlapping sections
- Color each section individually, without overlapping colors.
- Color along the lines.