Slow and steady repetition deepens mindfulness while the quirks of each artist’s “ribbon” arrangement allow for personal expression and problem solving that keeps engagement high.
This is an excellent way to relax your mind, reset your mood, or refocus your busy brain. It is easy to do and you can stop or start at any point to be picked up later for more. There is no wrong way to do this and there are no mistakes. Every time you do it, it will be different.
We practiced this exercise in our Art & Nature retreat on February 1, 2025, and I want to share the instructions in case you want to try it at home.
Materials
I believe that art can be done with any materials you have at hand. Reusing, recycling and reducing is the best. But if you want to buy things special, I have shared some products link through the Amazon Affiliate program and and I’ll get a little bonus if you purchase them:
- Paper – any paper will work. I love this smooth Muse brand Kent drawing paper.
- Pen – A ballpoint is great. If you want to get fancy, try the fine point Micron Pigma pens.
- Colored pens, crayons or pencils. Whatever you have will work. I like illustration markers like this Shuttle Art 24 piece set
Instructions
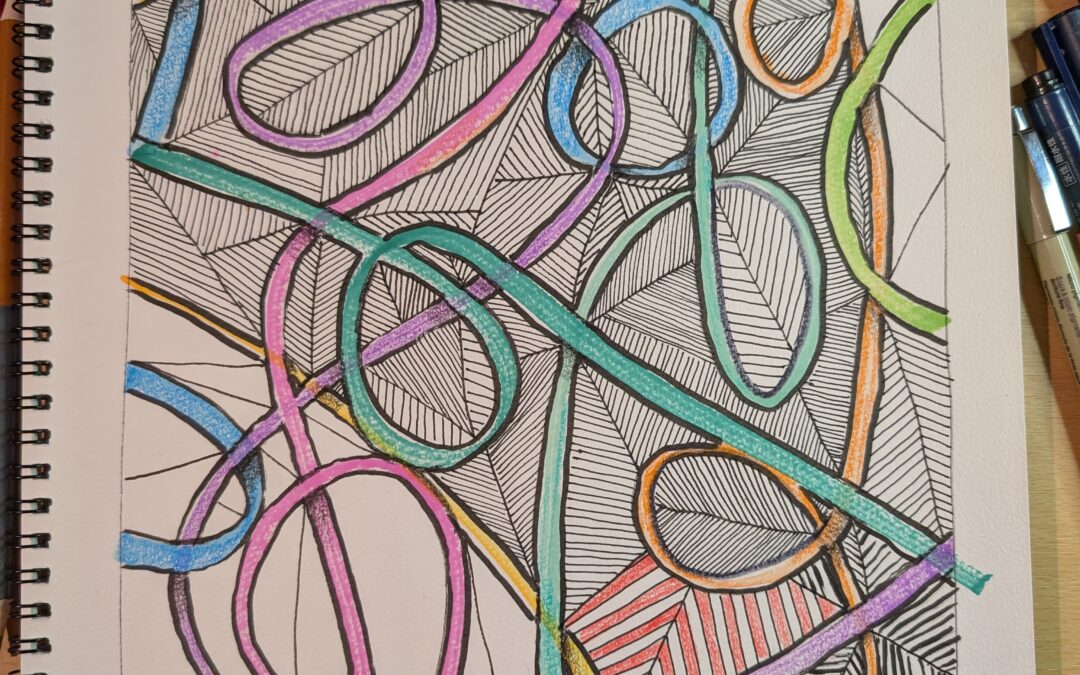
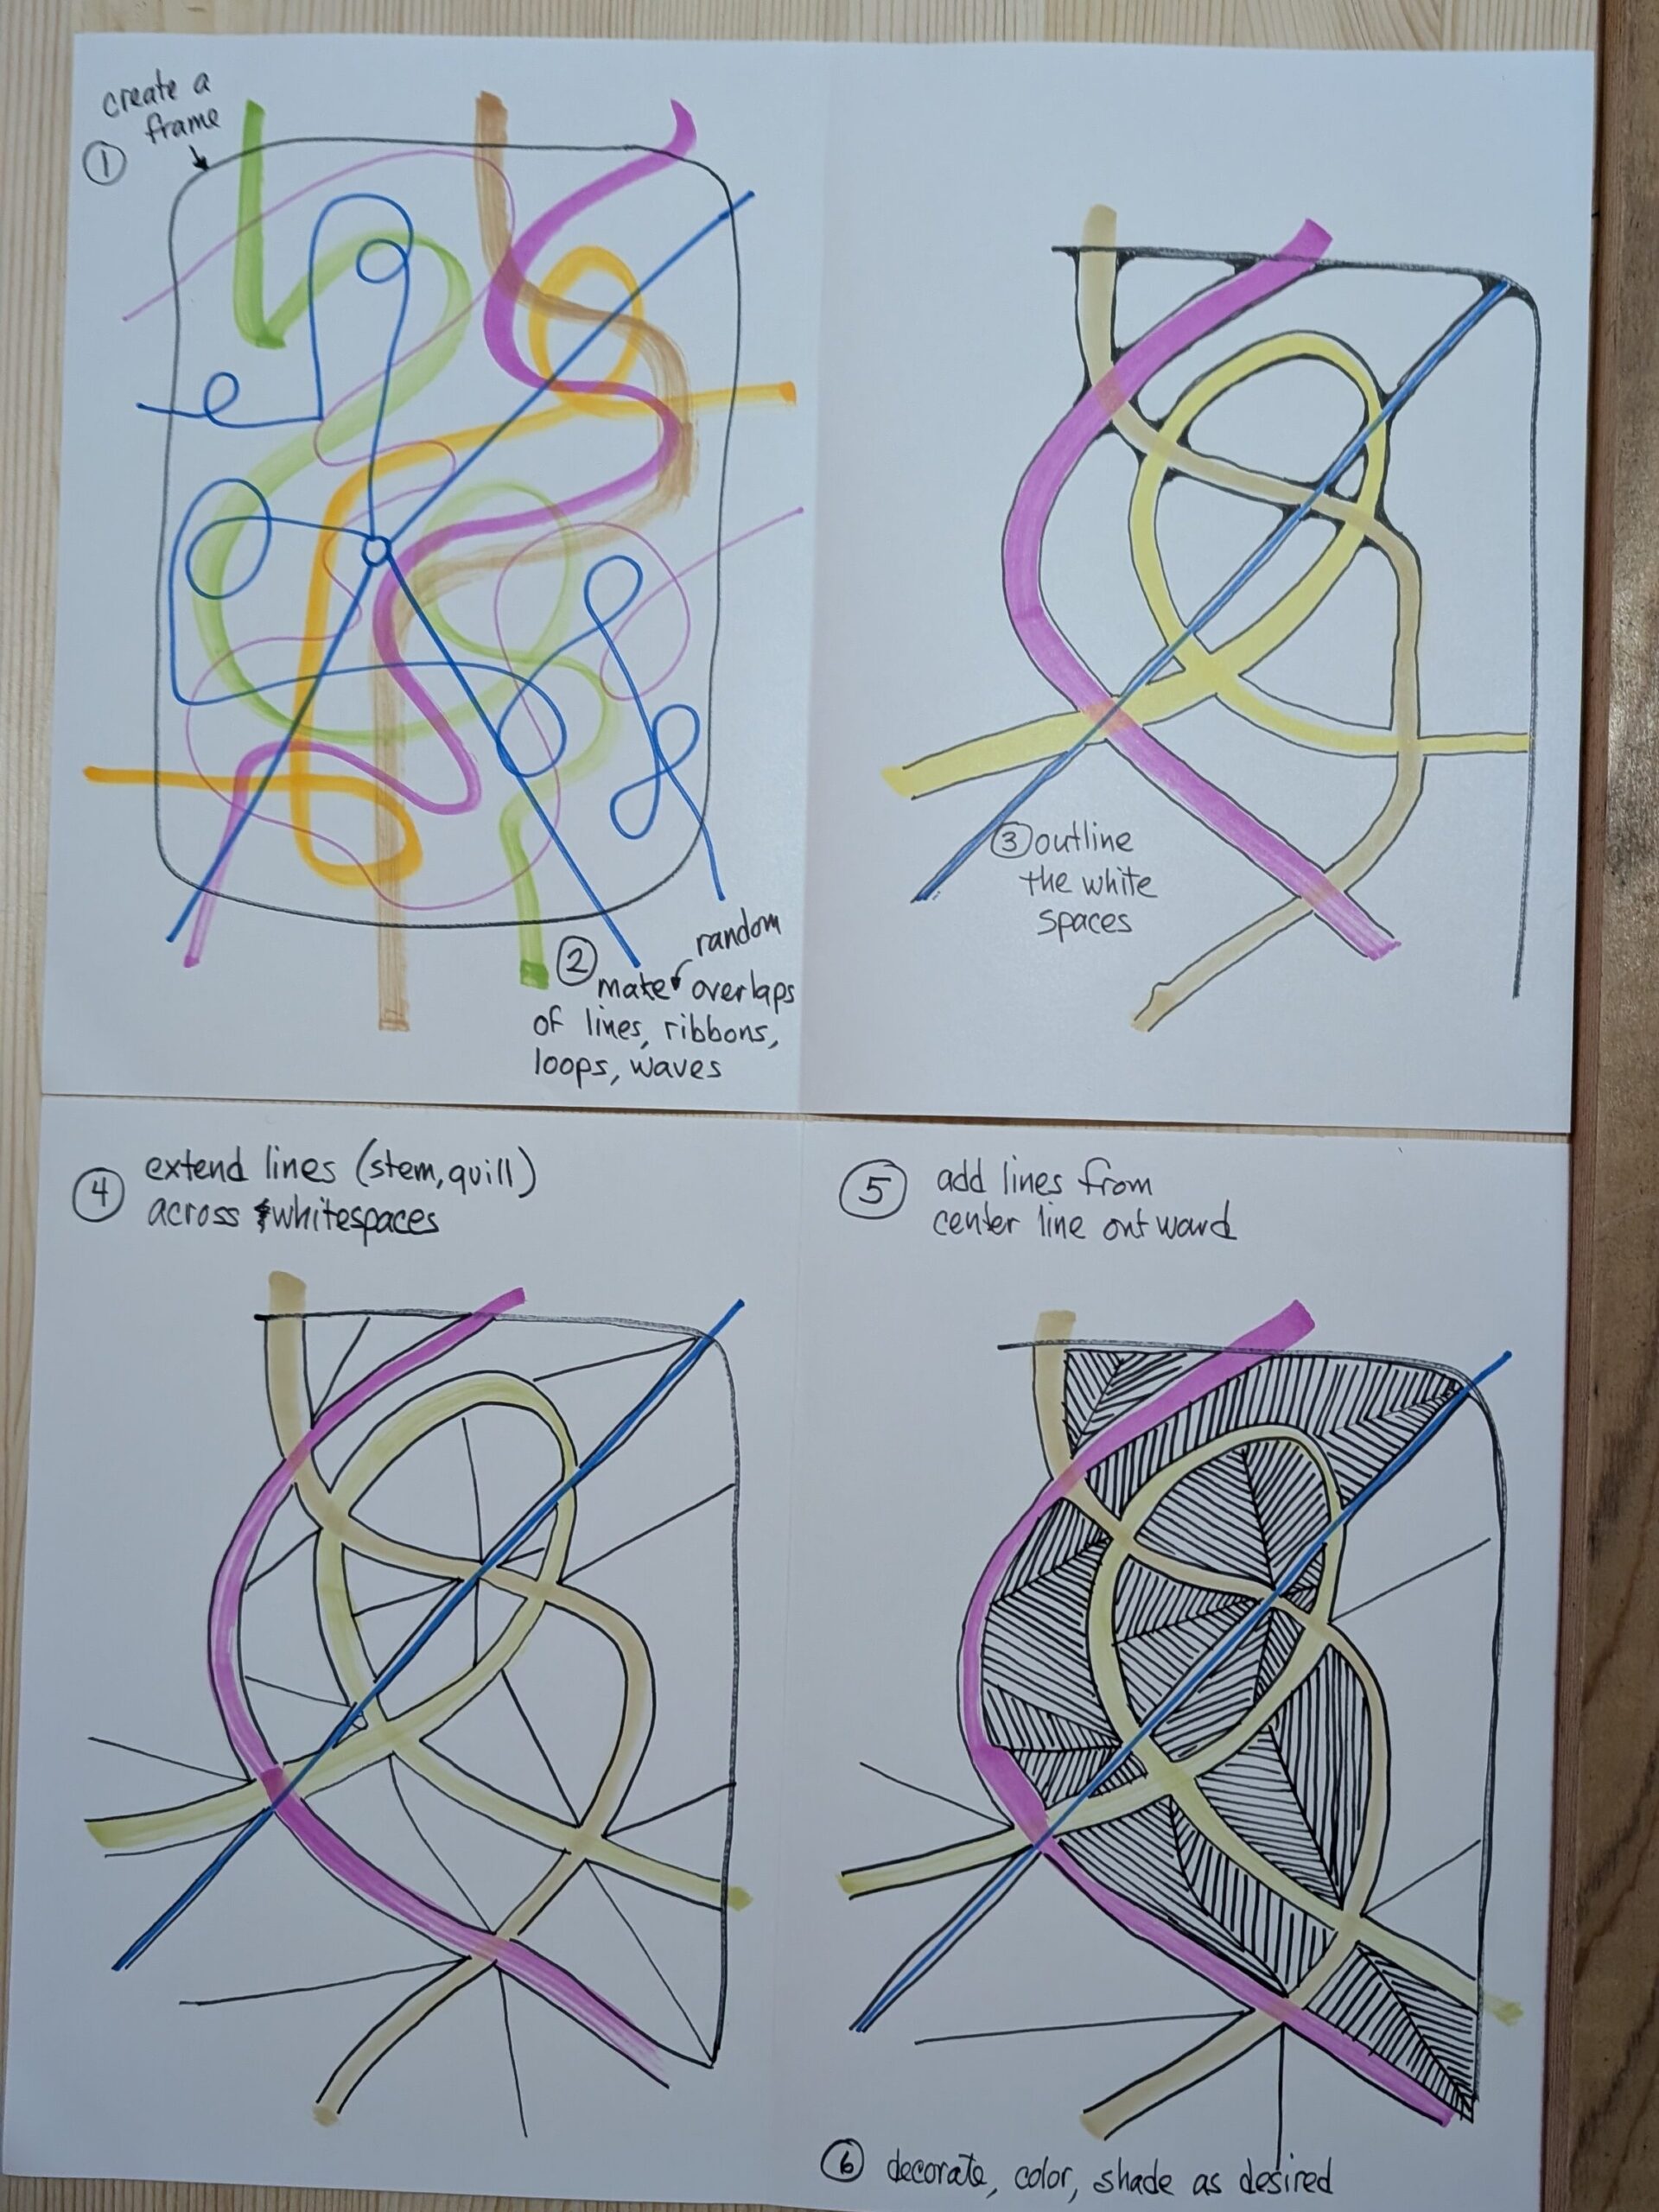
- Create a frame on your paper with a pen. Make the frame any shape you want. It doesn’t have to be perfect but if you like control you can trace or use a ruler. Leave enough space outside the frame to rest your hand.
- Use colors to crisscross wavy ribbons, swirls, and lines through the frame. Don’t think too hard about it, but the more intersection points, the better. You want to end up with lots of spaces and wonky shapes in between the ribbons.
- Outline the white spaces by tracing along the ribbons. Sometimes this is called “inlining.” Take your time and try to keep your inlines close to the edges of the ribbons. If you go off course, no worries; you can always fix it by filling in with color later.
- Inside each inlined space, draw a straight-ish line from one side to the other. This is the stem of your leaf, the quill of your feather. Starting from a corner works nicely, but sometimes there are no corners. Sometimes the spaces are long rectangles. In that case, draw some extra lines. This will start to make sense in the next step. Also, you can choose to combine this step with the next step, doing both for one whitespace at a time.
- Draw multiple parallel-ish, straight-ish lines from the center line/stem/quill to the outer edge of the whitespace. Take your time, making sure that your pen touches the center line and the inline. This is the repetition that will set your mind into relaxation mode. The more white spaces you have, the deeper your relaxation can go. If you use a fine line pen, then you’ll be able to draw many lines; a thicker pen will be fewer lines.
- After filling in all the spaces with lines, you can go next level with shadows and shading, or coloring in, or adding dots or other overlaid patterns.
If at any point you want to stop, then stop. You can say it’s finished. Or you can set it aside and pick it up again later. This is your drawing, your meditation. You know yourself best.
If your lines don’t touch the outlines, this can be an indication that you may be be rushing to finish. You aren’t fully relaxed and connected to the exercise. If you feel tense or rushed or stressed and want to slow down more and connect to your mindful side, then take a few slow, deep breaths. Match your drawing pace to your breathing.
About Drawing Meditations
Drawing Meditations takes away the need to “do it right” and gives you space to be while also satisfying your need to do. As you create, you are guided to reflect on the topic of the meditation or simply relax your mind. Your dreamy subconscious and practical inner critic find harmony.
The meditation gives your subconscious a chance to chew over ideas, play, and relax while the conscious mind practices what it learned. It doesn’t matter if you are an artist or not. The goal is not to create that “perfect vision” image. The process is the key. One of the things that I love about this technique is that nearly everyone in our classes has an “aha moment” and a peek into their own hidden thoughts.